How to Build a Kitchen Island
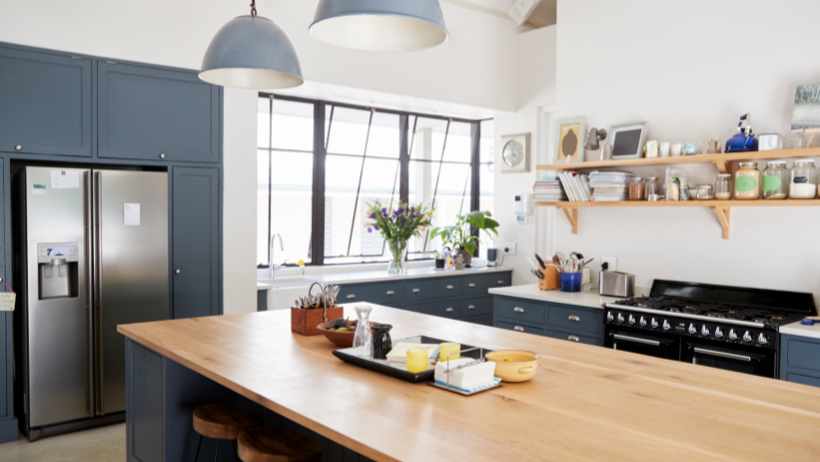
Thinking about adding more style, storage, and function to your kitchen? A kitchen island can do all that—and more. Whether you’re planning a simple DIY kitchen island or want extra prep and seating space, the key is careful planning and the right steps.
In this guide, you’ll learn exactly how to build a kitchen island, from choosing materials to the final finishing touches. We’ll also cover cost tips and help you decide when it’s worth calling in the pros—like the expert team at Brown Building Contractors.
Planning Your Kitchen Island
Define Your Island’s Purpose
Start by deciding what you want your island to do. Will it be used for storage, food prep, seating, or all of the above? A multi-use kitchen island can be a real game-changer.
If you’re thinking about how to build a two-tier kitchen island, consider how the raised level will serve you—bar seating, extra counter space, or simply adding visual appeal.
Budget plays a big role when planning. If you’re wondering how much does it cost to build a kitchen island, the answer depends on size, materials, and whether you’re going DIY or hiring a pro. Simple builds might cost a few hundred dollars, while custom islands can run into the thousands.
Measure Your Space
Make sure you have enough room to move comfortably. Aim for at least 36 to 42 inches of clearance around all sides of the island. The size should suit your kitchen layout—large island is enough to be useful but not so big that it crowds the space.
Design & Layout Considerations
Decide between a one-tier or two-tier design, depending on your needs and style. Also think about whether you’ll need plumbing or electrical for things like sinks or outlets. Finally, choose a design that blends well with your existing kitchen so the island feels like a natural fit.
Materials & Tools Needed
Before you start building your kitchen island, make sure you have the right materials and tools on hand. Here’s what you’ll need to get the job done right:
Common Materials
- Plywood or MDF for building the island frame (or repurpose IKEA cabinets as a base for a budget-friendly option
- Countertop options like butcher block, granite, or quartz
- Paint, stain, or sealant for finishing
Essential Tools
- Circular saw, drill, level, and screws
- Safety gear such as gloves and eye protection
Optional Add-ons
- Casters if you want a movable island
- Built-in shelves or base cabinets for extra storage
- Electrical outlets or lighting if you’re adding electrical features
Step-by-Step Construction
Build the Island Base Frame
- Measure and cut your wood MDF panels to match your island’s dimensions (considering the countertop overhang).
- Assemble the wood frame using screws, brackets, or pocket holes.
- Check for level and square, adjusting as needed to ensure a sturdy, balanced base.
Attach the Countertop
- Choose a counter top material that fits your kitchen’s look and lifestyle—options like butcher block, laminate, or stone all work well.
- Secure it from underneath, making sure it’s centered and flush with the frame.
- Seal the edges to protect against moisture, spills, and wear.
Customize Your Island
- Install extras like open shelves, kitchen cabinet doors, or a seating overhang, depending on your needs.
- Add your personal touch with details like a microwave nook, wine storage, or a butcher block top that blends beauty and utility.
- Finish with trim or molding for a clean, polished look.
Finishing Touches
Paint or Stain
- Choose a finish that works with your kitchen’s overall style—whether it’s a bold color, natural wood, or something in between.
- Apply paint, stain, or sealant evenly, following product instructions. A protective top coat helps your island stand up to daily wear and tear.
Hardware & Accessories
- Install hardware like handles, knobs, or hooks to add function and personality.
- Add lighting or outlets if you planned for wiring during the build—perfect for charging stations or task lighting.
Two-Tier Modifications
- Build a raised section if you’re creating a two-tier island for bar seating or extra prep space.
- Check for support and balance, making sure the upper level is securely attached and matches the rest of your design.
Maintenance & Safety Tips
Regular Cleaning & Care
To keep your kitchen island looking great, follow cleaning practices that match your materials. Wood surfaces should be wiped with a damp cloth and dried right away, while stone or laminate may need gentle cleaners.
Always avoid harsh chemicals. To prevent damage, protect your island from standing water and hot pans, which can cause warping, staining, or cracks over time.
Safety Considerations
Make sure the island top is stable—especially if it’s heavy or in a high-traffic area. Securing the base to the floor may be a smart move for added safety. If you have young children at home, consider rounded corners or edge guards to reduce injury risk, and avoid placing sharp or heavy items within reach.
Conclusion
Building a kitchen island is a great way to add style, storage, and functionality to your home. While a DIY kitchen island can be a rewarding project, it’s not always the easiest path—especially when plumbing, electrical, or custom finishes are involved.
DIY isn’t for everyone—building kitchen island projects can get tricky when plumbing or custom finishes are involved.
If you want a polished, professional result without the hassle, the team at Brown Building Contractors is here to help. Get in touch with us today for a free consultation and estimate—let’s turn your kitchen island vision into reality.
Related Article: Creative Kitchen Island Ideas to Elevate Your Space